
Contracts can be added in the platform in three (3) ways:
1. Add a contract at the module level
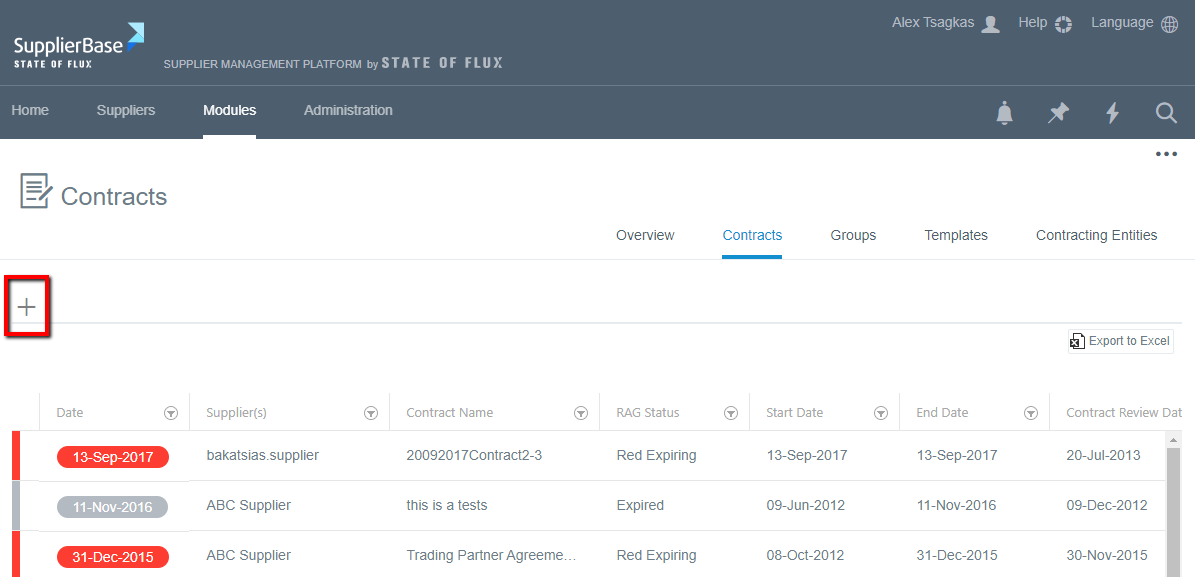
This action can be performed by users with high permissions at the contracts module and therefore have access to contract information across all suppliers. From the Modules > Contracts > Contracts page, users can click the + button (see below).
The ‘Add contract’ window appears (see screenshot below) and it includes all the fields that your organisation has considered important to capture for their third-party contracts.
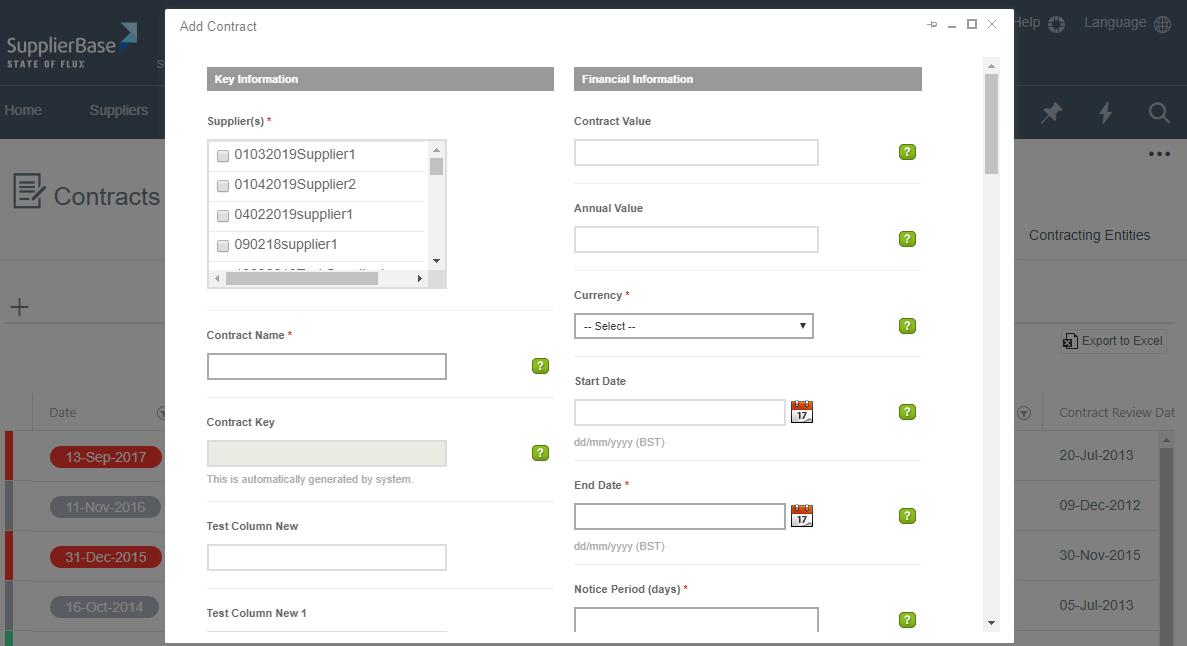
IMPORTANT NOTE: The contract meta-data fields can be configured to meet your preferences. Please speak to your system administrator and / or submit a support request at Zendesk if you would like to configure your contract meta-data fields.
Some fields are mandatory and some other are optional. The mandatory fields are indicated with an asterisk (*); a contract cannot be saved in the platform unless all mandatory fields are filled in. The question mark icons next to some fields provide help / instructions about how to complete a field.
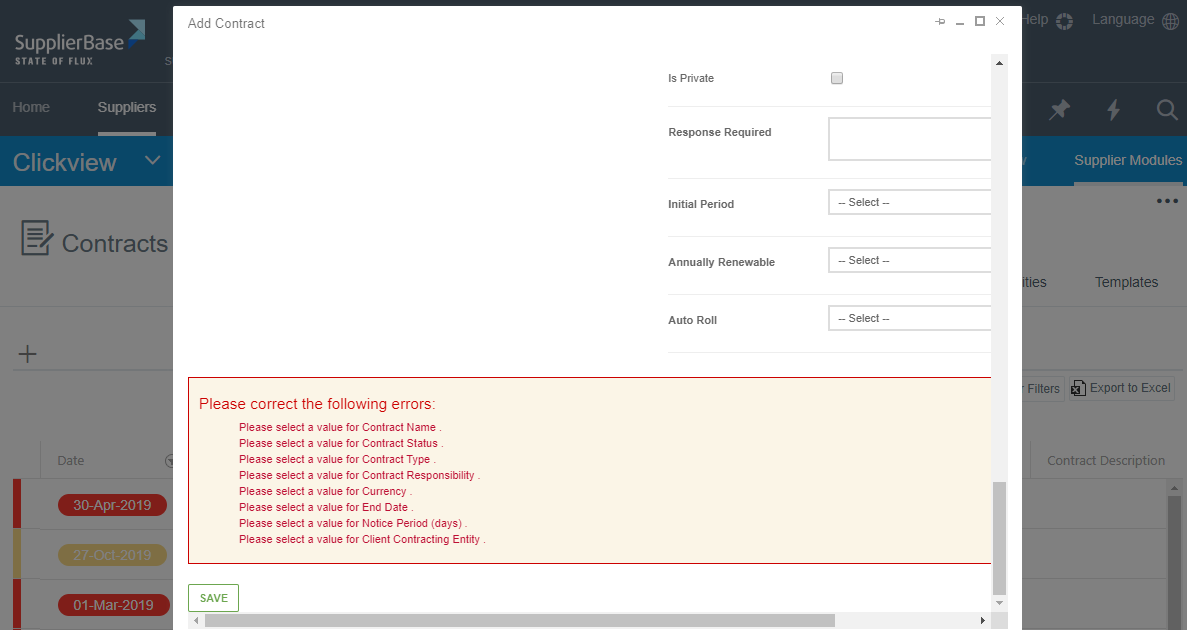
Once all the necessary fields are completed, users can click on the ‘Save’ button at the bottom of the page. If a field is not appropriately filled-in, the contract will not be saved and the system will notify the user in order to fix it with the following message.
2. Add a contract at the supplier level
This action can be performed by users with permissions to view and add contracts for specific suppliers (at the supplier level). From the Supplier Modules > Contracts > Contracts page, users can click the + button (see screenshot below). The process is exactly the same as described above.

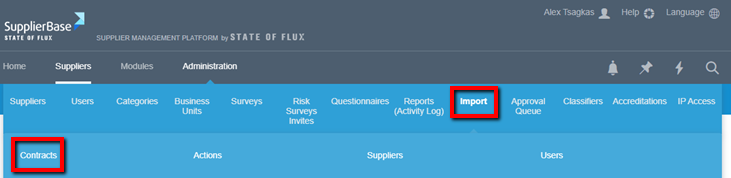
3. Import contracts in bulk using the Import feature (system administrators only)
As a system administrator, you can import contract information in the platform in bulk from the Administration > Import > Contracts page.
There are three steps that you need to follow in order to import your contracts. Firstly, you need to download the excel template that is provided by the platform and contains all the fields that you have to fill-in. Secondly, you have to upload the file in the platform. And thirdly, you need to review the results of the import task, identify and validation errors / notifications and re-import the file, if needed.
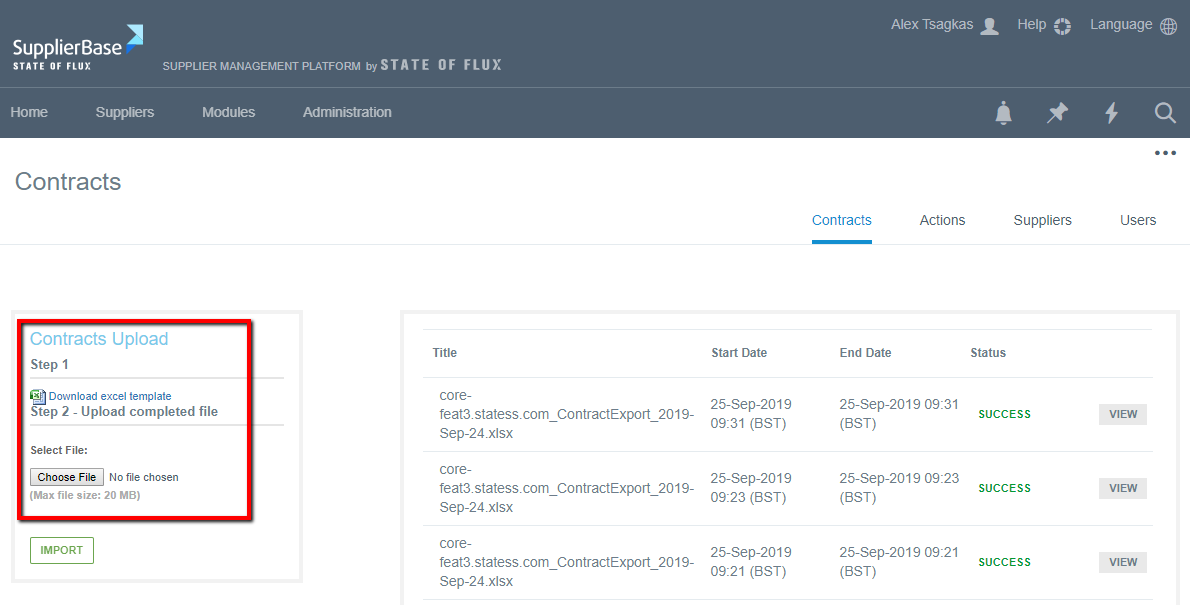
When you upload the completed file in the platform, one of the following three statuses will appear: Success, Partial Success and Failed. If the status is Success, no further action is needed by your side. If it is Partial Success or Failed, you need to press the View button next to the Status and fix the errors that are reported there in order to successfully import the Contracts.

For more details please refer to the article "How to import contracts in bulk to SupplierBase".
Please also note that you can massively add the scanned documents of your contracts with a File Transfer Protocol (FTP). Please refer to the article "How to upload document files in bulk in the platform".
NOTE: For this action you will need the help of our technical team. Please speak to your system administrator and / or submit a support request at Zendesk.