
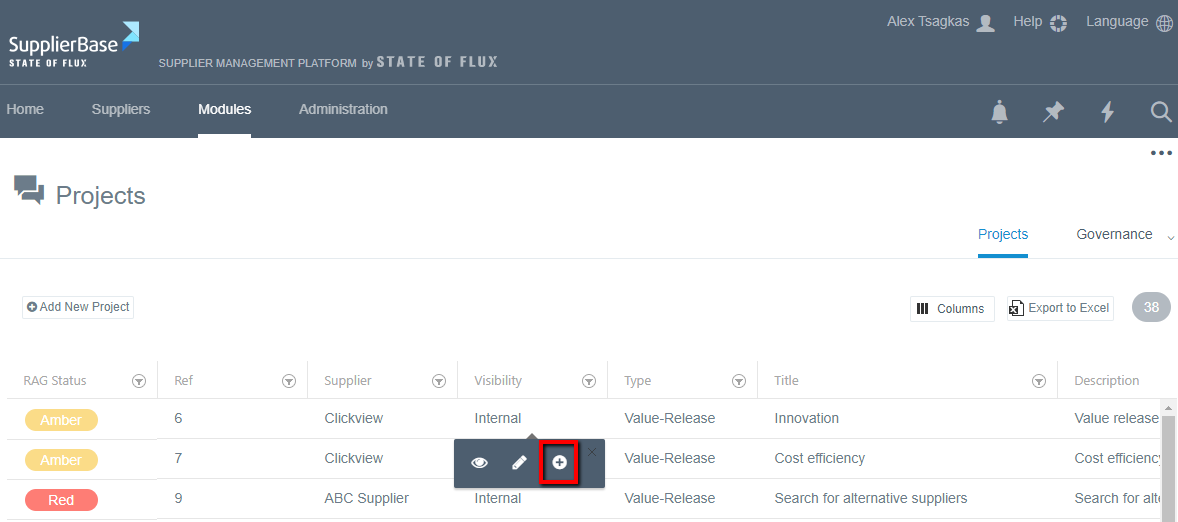
In order to edit a project, you have to go to the list of projects, click on the project you want and select the plus button.
Once you do that, a pop up window appears.
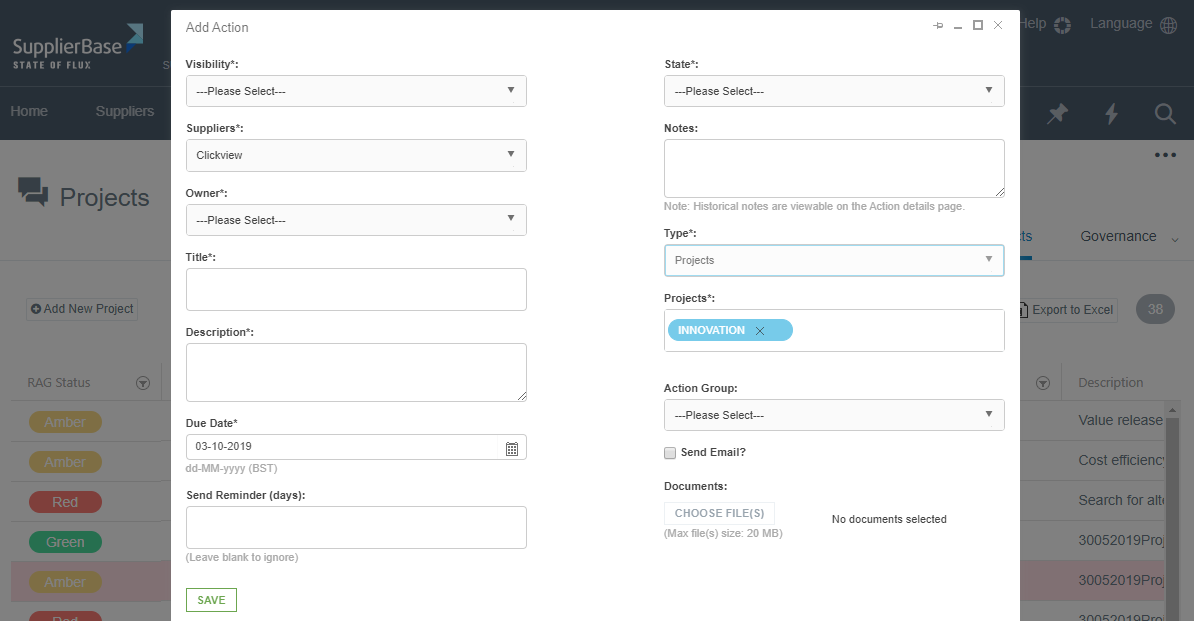
The fields in this window are the following:
Visibility: you have to select among the supplier shared, internal only and non-supplier option.
If you choose the supplier-shared or internal only option, this means that the action is related to a supplier, and if it is supplier-shared the supplier can view the action, whereas if it is internal-only the supplier will not be able to see it. In case you choose the non-supplier option, the action may not be related to a supplier, but it may serve only internal purposes.
Suppliers: choose the supplier this action is related to.
IMPORTANT NOTE: in case you have selected the non-supplier option in the visibility field, the suppliers’ field will be hidden.
Owner: the person responsible for completing the action (either customer user or supplier user).
Title: the name of the action
Description: details of the action
Due date: the date by which the action must be completed by
Send reminder (days): in case you want the Owner to receive a reminder email some days before the action is due, type the number of days you want.
State: select the state of the action, whether it is new, in progress, on hold etc.
Notes: add some notes to the action.
Type: since this action is related to a Project, the field is pre-populated with Project
Projects: the specific project this action is related to (pre-populated field)
Action group: select from the drop-down list is the action group is executive, operational or management
Send mail: if you want to notify the action owner about the action, you can check the box and he will receive an email that an action has been added for him
Documents: upload any relevant documents
Once you have completed all the necessary fields, click the Save button and your action will be saved and added in your list of actions.